vrijdag 4 april 2014
INSTRUCTABLES
This is our link to the instructables of the stand-alone rain water collector:
http://www.instructables.com/id/Stand-alone-rain-collector/
http://www.instructables.com/id/Stand-alone-rain-collector/
CONSTRUCTION DAY 3
CONSTRUCTION


And in the end the structure can be foldable very easy.


Day 3:
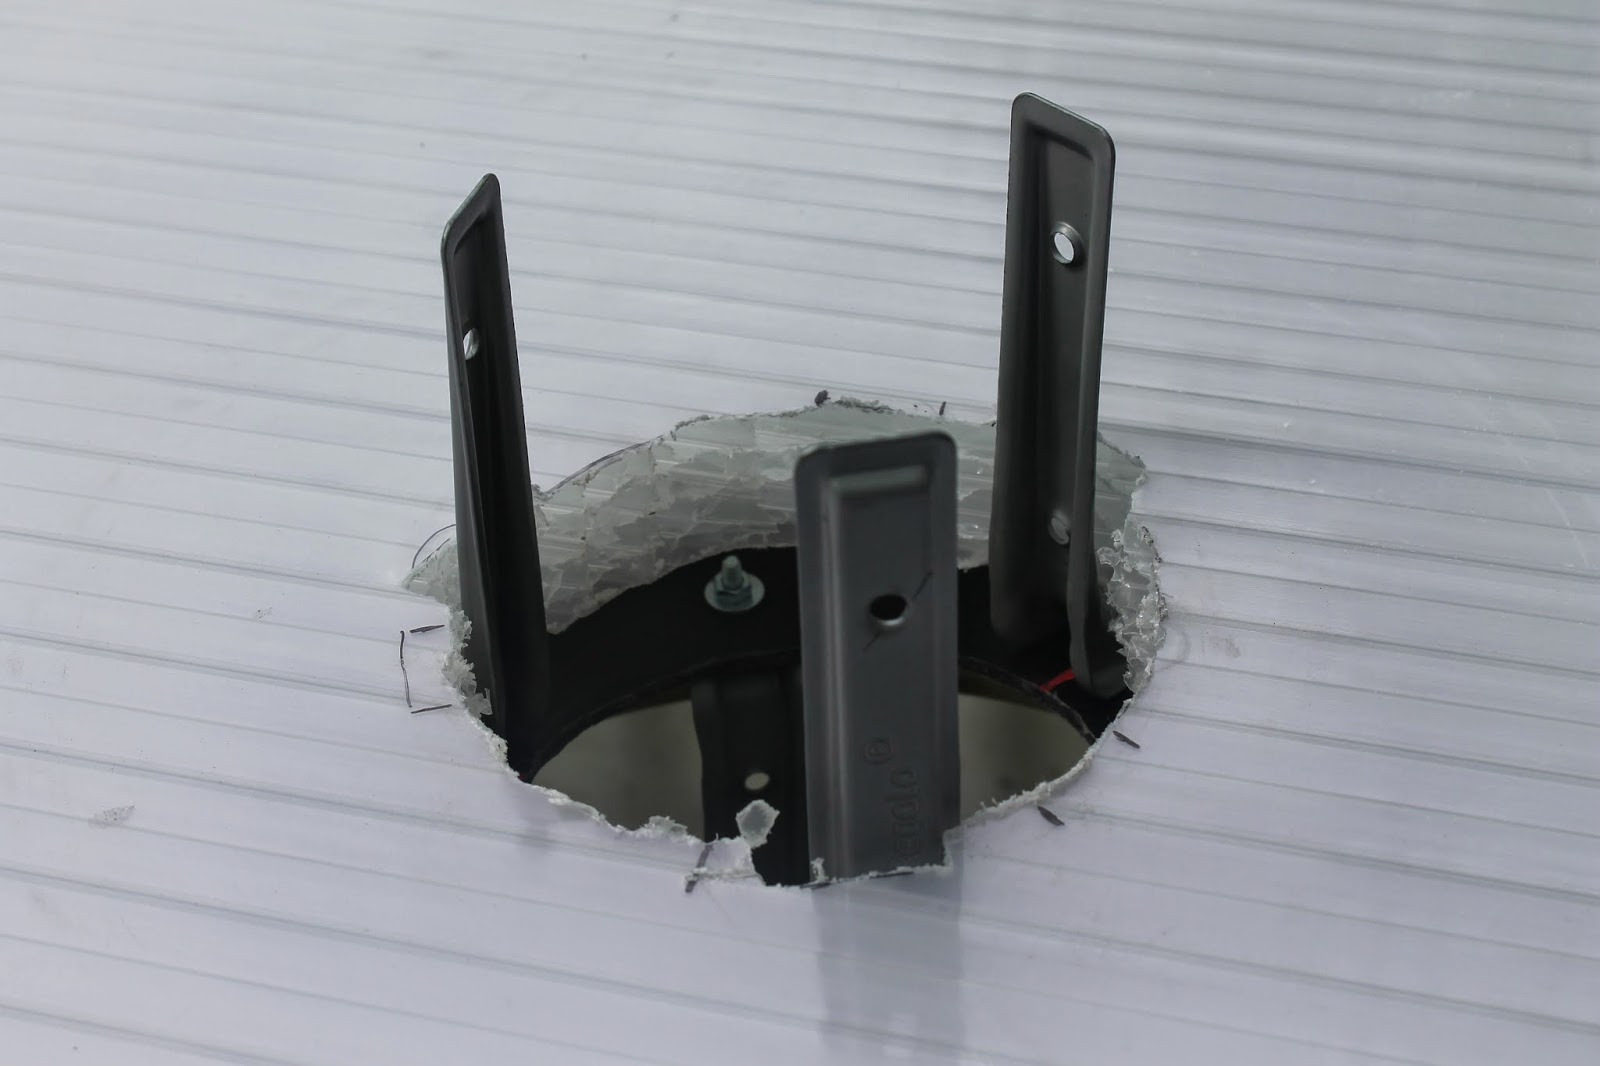
We choose a material for the tabletop and made a hole in the middle with the same diameter as the central tube. We made another in the shell of the tank, these holes are for inserting the orange tube.
We made several holes in the base of the orange tube. We attached six shell supports to give extra stability. The last step was screwing the tube and the shell together for maximum stability
We connected our table top to the barrel structure with some tension straps.
We connected a standard hose to the tap with a metal tension strap. People can now take water using the hose to fill their buckets.
The last step was assembling. We inserted the orange pvc tube in the tank and opened the fabric using ropes. We put the ropes to the ground using a piquet.
And the final result:
And in the end the structure can be foldable very easy.
CONSTRUCTION DAY 2
cONSTRUCTION
Day 2:
Day 2:
We began sewing the impermeable fabric.


Then we inserted the tubes in the fabric and connected the fabric by the rings with the top of the tubes.


We made holes in the base of the fabric, and inserted the rope, which is attached to a stone with a net around it. And we inserted it into the orange tube. This is our counterweight to make sure the fabric stays in the tube.


Following, we attached the net with the corners of the top of the impermeable fabric to the rings and then we secured everything with some tension straps.


The last step this day was secure that all the tubes stay together using a a tension strap through the pipes and using 2 metal tension straps around the tubes.

donderdag 3 april 2014
CONSTRUCTION DAY 1
CONSTRUCTION
Day 1:
We started making the
central structure; we made eight holes and put the snaps in for the gray pvc tubes.


Secondly, we drew the triangles in the right size and then cut the fabric following the
shape.


Later we made the connection of the ropes with the grey tubes.


maandag 31 maart 2014
FEEDBACK AFTER CONCEPT PRESENTATION
Mondaymorning 31/03 we presentated our concept to the jury, this is the most important feedback we got:
- Use a barrel! by connecting the rain catcher to a barrel it's more stable and you don't have to put something in the ground
- Make sure it's an strong fabric
- Vandalism proof ?
- strong enough?
- Use a barrel! by connecting the rain catcher to a barrel it's more stable and you don't have to put something in the ground
- Make sure it's an strong fabric
- Vandalism proof ?
- strong enough?
FINAL CONCEPT
After discussing the different concept variations, we choose the following as our final concept for the concept presentation of monday.


To tap the water we drill a hole into the central tube and attach a tap in it. A garden tube can be attached on it to let the water flow to the reservoirs.
The product we designed is an independent catcher with a surface of 3x3m square.
To provide stability to the catcher, we drill a wooden pole (standard fence part) approximately 1m into the ground. The catcher also functions as a parasol in sunny days and has a standing table for the gardeners to chat/BBQ/ have a drink....
For the construction we chose to work with a thermoplastic canvas sheets that can be ironed (DIY) onto eachother. We have to test how thick and/or reinforced the fabric has to be to withstand the forces of nature (wind, rain, snow...).
For the bended tubes we choose standard PVC tubes for electrical applications + their connection parts, which means they can be found easily and cheap. Also the central tube is made of PVC and guides the water downside. PVC is quite strong and resists outdoor conditions.
To hold everything in tension we'll work with washing line ropes; they are pretty strong and cheaper than steel cable.
To fix the hole catcher into the ground, we choose here to slam a wooden pole into the ground and then just shove the pvc tube over it. Then a pen can be put through those 2 to lock it from being picked away.
To tap the water we drill a hole into the central tube and attach a tap in it. A garden tube can be attached on it to let the water flow to the reservoirs.
zaterdag 29 maart 2014
CHOSEN CONCEPT VARIATIONS
The original concept was all about gathering the rain underneath the catcher. This gave us a lot of problems because the connections between the different barrels and the catcher itself are differnent with every barrel.
#1 : we put the catcher onto a tripod

#2 : me make our product like a standard parasol, that way you can put the catcher in the hole in a gardentable.


Our focus on this project is the simplicity of the product. The DIY-use is our main focus. With our current solution is very hard to think about one specific connection that fits with every barrel.
Another problem is the volume of the barrel. A standard barrel of 160 litres is to small and the cubic barrel of 1000 litres is way too big for 9 m^2.
Because of all these problems we started thinking in slightly another direction. Now we want to create rainwatercatchers apart from the barrel. This means we can connect multiple catchers to the same barrel with some tupes or some hoses.
The pictures underneath show some solutions for the anchoring into the ground.
#3: we fixate our pole into the ground with a standard metal anchor for fences. This is the most easy solutions, it's stronger than the others and very cheap.
vrijdag 28 maart 2014
CONCEPT FEEDBACK CLIENT
Today we went back to the client with prototype 1 and 2. We also showed our designproces and some different ideas.
She said she liked prototype 2 the most because of the shape.
Feedback prototype 1:
Positive:
- If you stand around the table you have a clear sight, the structure is not in your way
- If would be great if we could make this prototype using a simple drying rack
- nice double function, the bartable is great
- you can dry your clothes if you attach some more ropes
Negative:
- strong enough?
- the ropes should be attached to the ground instead of to the barrel itself.
- stability
Feedback prototype 2:
Positive:
- shape was very nice, like a flower
- simple DIY structure
- nice double function, she really likes the bartable
- with some extra ropes you can dry your clothes
Negative:
- sight if you stand around the table
- vandalismproof?
- stability
Because DIY is very important we choose for prototype 2, also because of its nice shape.
We will make some more sketches of the idea and start to work out the technical stuff.
IDEA SELECTION
We gave all the ideas a score on the different factors (demands/wishes) to become a final concept to work out.
These were the results:

The flexible raincatching system came out the best.
We will work further on this concept to optimalise it for DIY-use because some similar benchmarks already exist but not as a DIY-product. This will be our main goal for the final product.
These were the results:
The flexible raincatching system came out the best.
We will work further on this concept to optimalise it for DIY-use because some similar benchmarks already exist but not as a DIY-product. This will be our main goal for the final product.
PROTOTYPE #3
The third prototype is like an arc to put above the entrance of the garden. The arc is mad of a impermeable fabric supported by two barrels to collect the downfalling rainwater.


Positive feedback
Negative feedback
Makeability score: 5 (1/2 hour)
Positive feedback
- Expected: nice idea
- Unexpected: /
- Expected: stability
- Unexpected: /
Makeability score: 5 (1/2 hour)
donderdag 27 maart 2014
PROTOTYPE #2
The second prototype is in fact an inverted umbrella, with ropes to prevent the mechanism against breaking due to wind forces.


Positive feedback
Negative feedback
Makeability score: 2 (2 hour)
Positive feedback
- Expected: easy foldable (like an umbrella)
- Unexpected: /
- Expected: folding mechanism is more complex than prototype #1
- Unexpected: /
Makeability score: 2 (2 hour)
Abonneren op:
Reacties (Atom)